Biomes Curriculum

Week Three

Shelter

In Week Three, students will learn about how the location that people live in affects the way they live. They will also explore different construction materials that can be used for homes and houses.

  • Social Studies

    Child building structure with tongue depressorsSchedule
    Three to four 45-minute periods for read alouds

    Goals
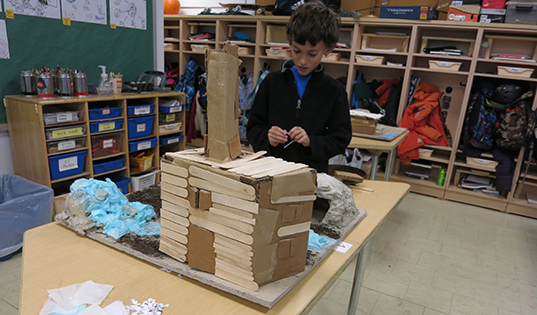
    Students begin to study the “social” aspect of this unit, that is, how people live in and interact with their biome. Teachers read aloud informational text picture books for each of the biomes. Students begin to understand the question of: How does where people live affect how they live? Students also learn how indigenous people survive in a particular biome. During read alouds, students practice informational text reading, comprehension, and note-taking skills.

    Materials
    Informational picture books that highlight the lives of people who live in each biome. Examples:

    • Tropical Rainforest:The Shaman’s Apprentice: A Tale of the Amazon Rainforest by Lynne Cherry & Mark Plotkin
    • Temperate Forest: When the Shadbush Blooms by Carla Messinger, Susan Katz
    • Wetlands: Meadowlands: A wetland survival story by Thomas Yezerski
    • American Desert: Dreamplace by George Ella Lyon & Peter Catalanotto (also The Shepherd Boy by Kristine Franklin)
    • African Desert: Sahara (Vanishing Cultures) by Jan Reyno

    Note taking sheets designed for each picture book.

    Procedures
    Over the next two weeks, teachers schedule time to read aloud all five of these books to the whole class. Teachers distribute a packet of note-taking sheets that contains one sheet for each book. While each sheet is customized to a particular book, students will be analyzing the people, clothing, shelter, food, water, plants, and animals in each of the biomes profiled in the books. During the read alouds, students will be working with each other and with the reader to complete the forms and share the learning.

    Assessment
    Formal: Teacher review of note-taking sheets
    Informal: Asking children individually and in whole group about learnings, discoveries and questions about their biome.

    Suggestions for Teachers

    • Combine the five note sheets into one packet for organization.
    • Be mindful of how race and ethnicity are represented in the books.
    • Encourage conversations around how humans have adapted to their particular biome.
    • Leave books out in the classroom and available for students to come back to on their own.
    • Consider a “picture walk” of the images to begin the read aloud.
    • Ensure that read alouds are interactive, and that discussions encourage connections to students’ lives.
    • Encourage students to compare and contrast the cultures across biomes.
  • Integrated Arts

    Biomes art projectSchedule
    One hour with classroom, art, and student teacher or volunteer teacher

    Goals
    While designing and adding textures to their houses, students will be thinking and making associations about the various qualities of materials and relating them to objects from the real world.

    Materials
    Texture materials such as: corrugated cardboard, hay, sand paper, wonderfoam, aluminum, bumpy fabrics, burlap, mesh, tacky Glue, T pins, brushes, scissors, chart paper.

    Process
    Motivation Questions (Full group discussion, 10 minutes)

    • What construction materials are houses made out of? (Make a list: brick, wood, mud, stone, siding, glass, cloth, other)
    • How do architects and engineers decide what materials to use?

    Visualization

    • Lets look at these materials. Can someone describe how this material feels and looks? What about this one? Each material here has a unique look and texture.
    • Which of these materials will you use, let’s say, for a tent? Why? What about a wooden house and why? What about a house made of clay and why?
    • What will your house be made of? Does anyone have a specific idea?

    Introduction of Materials (2 minutes)
    Today you will be covering the house you made last week using materials that make sense to your environment. We will be using tacky glue and a brush. I brought T-pins if you need to have something stay in place while drying. Take some time and talk to your group about the best materials before you start.

    Assessment
    Informal: Observe children’s conversations, choices, and model-building decisions. Ask questions about their choice of shape and size.

    Suggestion for Teachers

    • Allow each child to touch and explore the materials.
    • Have students stand up while working; put chairs away.
    • Assign an adult to each group. This adult will be the mediator and role model during the duration of the construction. We have found that it helps to manage conflicts and progress if an assigned teacher is dedicated to the group.
    • Cut all the textures in rectangles so that children can manipulate them easier.
    • Provide a brush and tacky glue to apply to the walls of the shelter.
    • Provide one place in the room for art materials to be displayed.
  • Handouts for Children

Week Three Snapshots

  • Shelter project made from tongue depressors
  • Materials for shelter art project
  • Buckets of materials for shelter art project
  • Shelter built from popsicle sticks
  • Child builds shelter for art project